
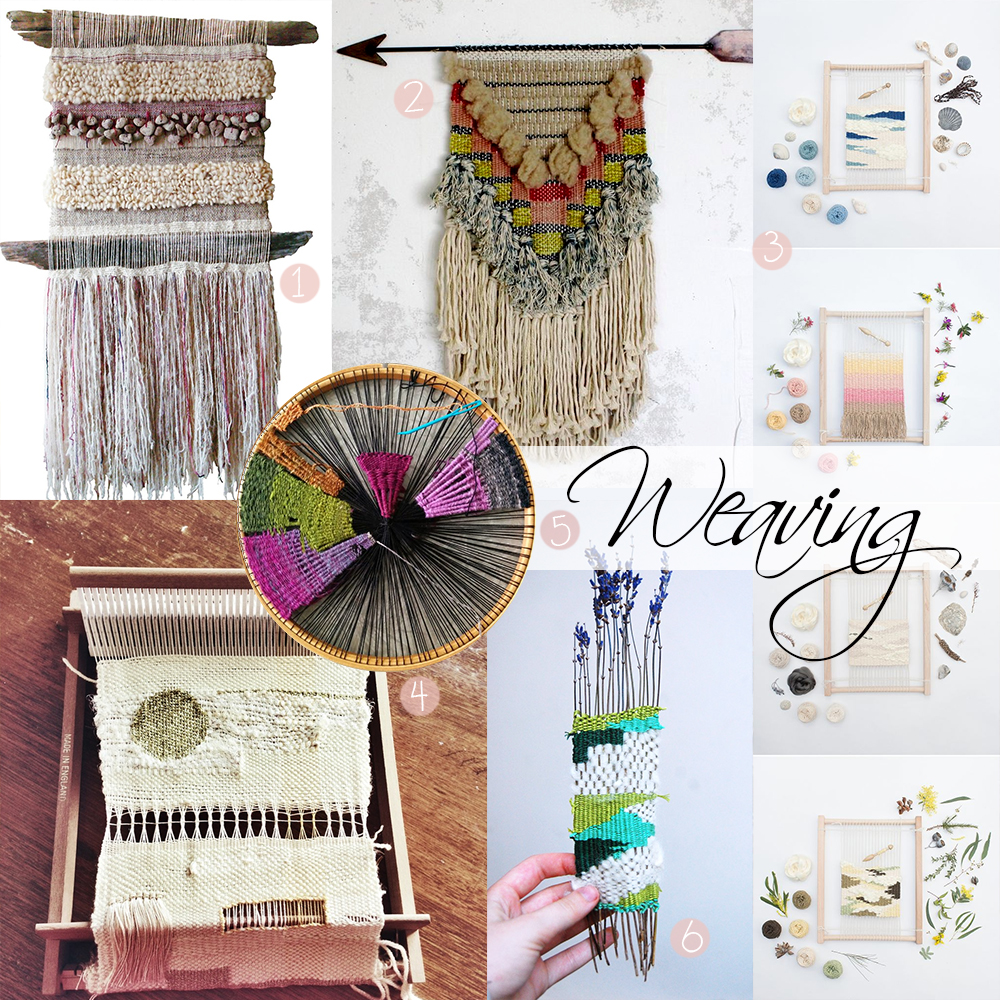
Weaving by Marianne Werkmeister
Weaving by All Roads
Weaving by Maryanne Moodie
Nature inspired weaving y Alchemy
Circular weaving by Craftophilia
Weaving by Marianne Werkmeister
Weaving by All Roads
Weaving by Maryanne Moodie
Nature inspired weaving y Alchemy
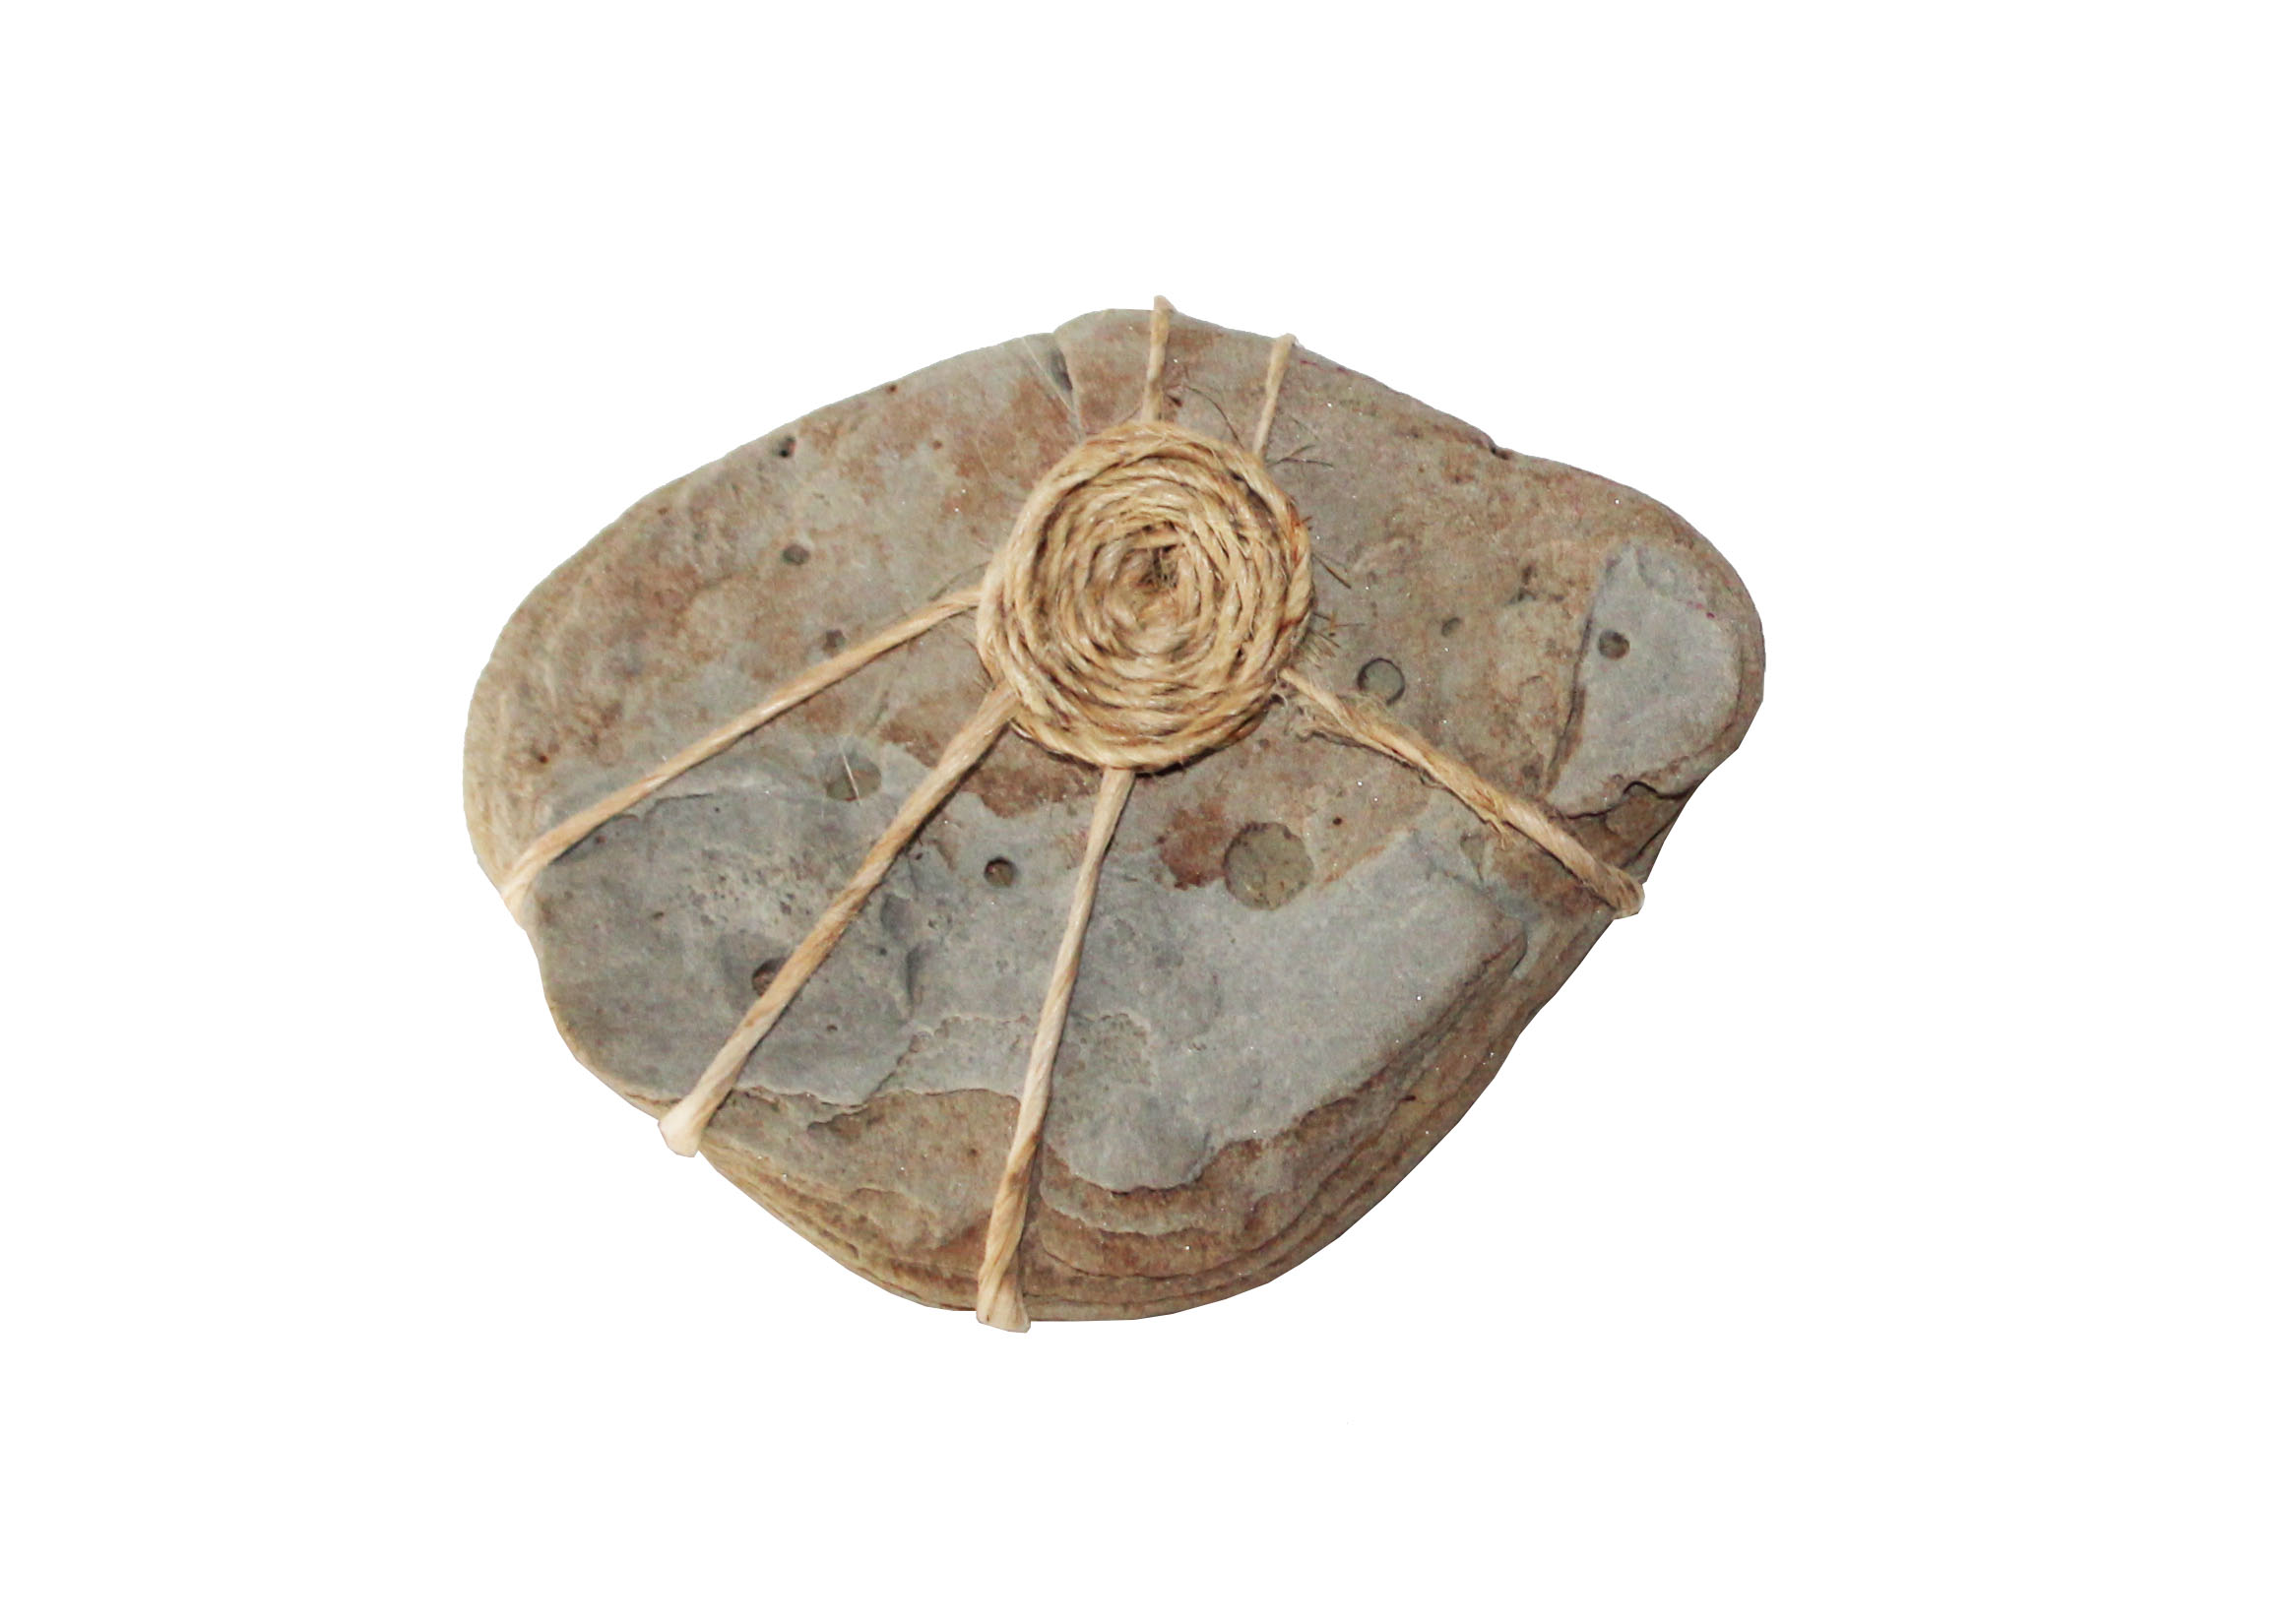
Circular weaving by Craftophilia
 Yesterday Etsy shared with us a great tutorial by Clare McGibbon showing us how to make a weaving without the use of a loom. It’s a great tutorial with easy to understand instructions, and clear images.
Go check it out & try making a weaving a yourself.
 I found this unfinished weaving at my local thrift store. Isn’t it beautiful? I’m not sure what I am going to do with it. I don’t have the skills required to finish it, but I couldn’t stand to leave it setting there on the shelf, all rolled up and unappreciated. Maybe it will find it’s way into a different kind of weaving project of my own. My creative wheels are turning. . .
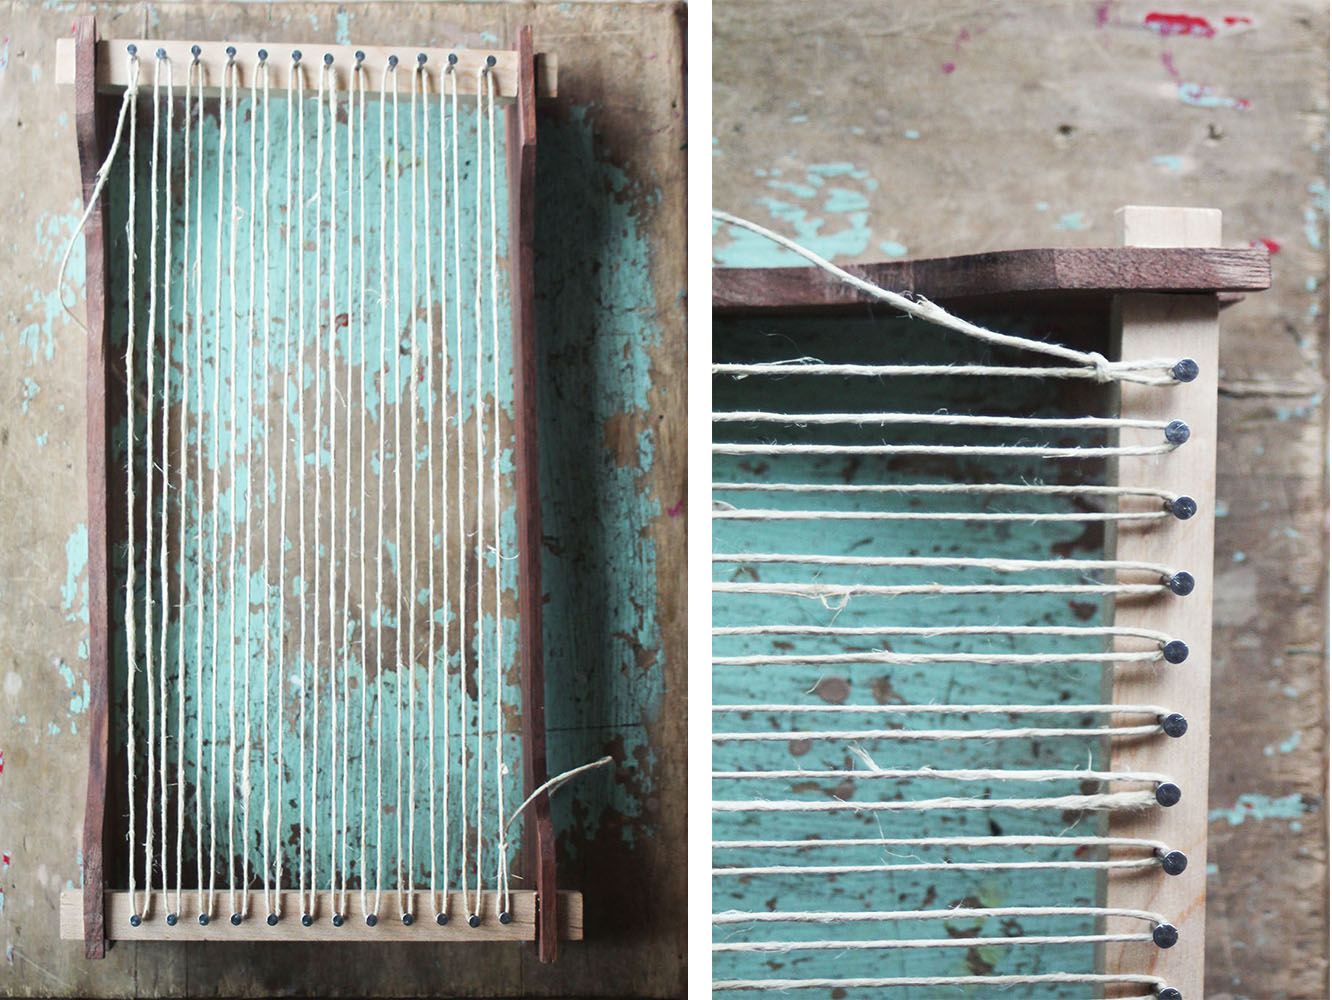
A weaving is made up of two sets of threads, the warp and the weft.
The word warp (from the Old English word, weorpan), means “that which is thrown across” and refers to the set of lengthwise yarns that are held in tension on a frame or loom.
When choosing a warp yarn, consider the strength of the fibers. Because the warp is held under tension throughout the process of weaving, warp yarn should be strong. Traditional yarn choices are wool, linen and silk, however, in more recent decades, cotton has also become a fine choice.
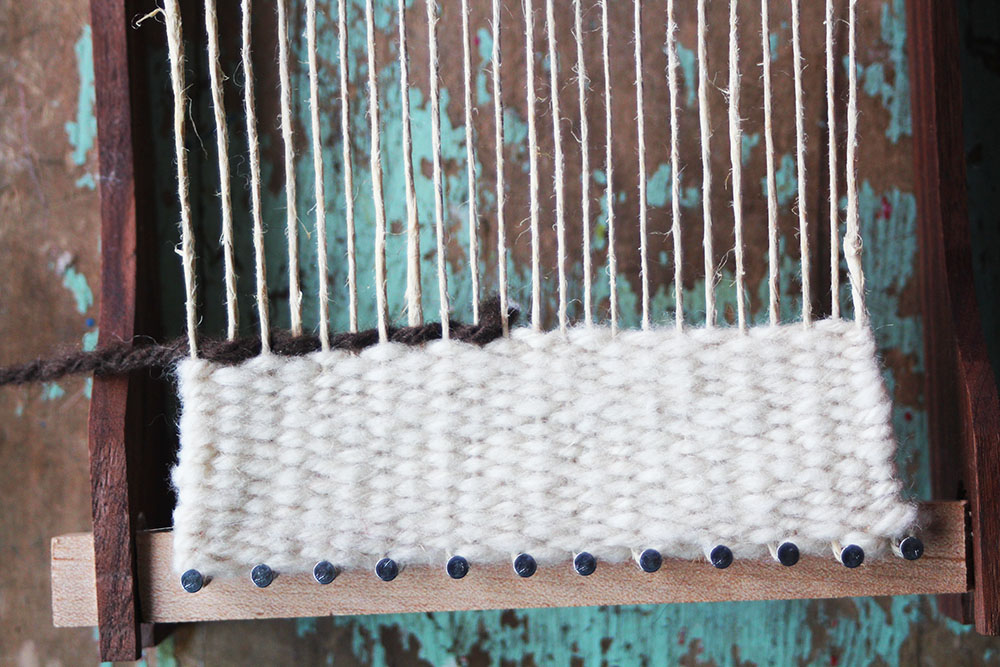
 The word weft (from the Old English word, wefan), means “to weave” and refers to the yarn which is drawn through the warp yarns to create cloth. This can be any yarn, fiber, ribbon, fabric, ANYTHING. Between the weft and the warp, the weft is typically the most visible of the two.
To weave, use a long needle to weave over, then under, over, then under each of the warp threads until you reach the other side. Pull the working weft yarn across the loom.
A weavers comb is a useful tool to help make the weft tight.
 When pulling the weft tight, be mindful of the tension. If pulled too tightly, it will cause the warp to pull in on the edges. The ends should remain slightly loose allowing the warp to lay flat without distorting the sides.

To begin a new yarn, weave the working yarn through half of the warp threads. Then, with the new yarn, begin where the previous yarn ended. Push any loose ends to the underside of the weaving.
 How to remove the weaving from the loom will depend on the type of loom being used. For this type loom, simply pull the weaving up over the nail heads.
Once free from the loom, it is ready for finishing. There are a number of ways to finish the ends. One way is to whip stitch around the warp threads. To do this, lay the warp horizontally across the top of the weaving, folding the warp toward the center. Then, use a yarn needle to whip stitch over these threads. Once half-way across the top, begin folding the warp the opposite direction so that all of the ends are facing the center of the weaving. Do the same thing to the other end of the weaving, and it is ready to be displayed.
[] :: [] :: [] :: [] :: [] :: [] :: [] :: [] :: [] :: [] :: []
The loom used in this tutorial is a great little loom that is easily disassembled for travel. It is made from reclaimed exotic hardwoods, and is available in the shop!

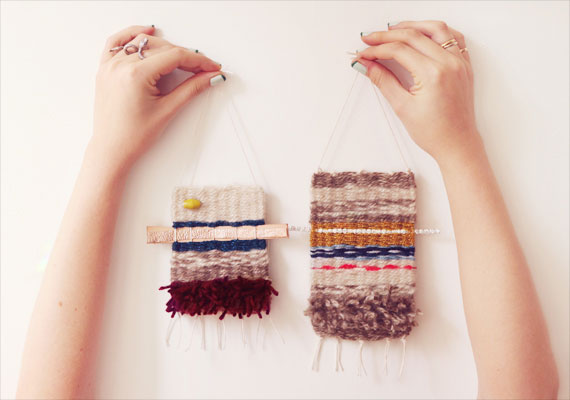
In celebration of my of 14th wedding anniversary, I wanted to share with you a weaving I did a few years ago honoring our wedding day.
My husband & I got married on the beach of Lake Michigan at sun set.
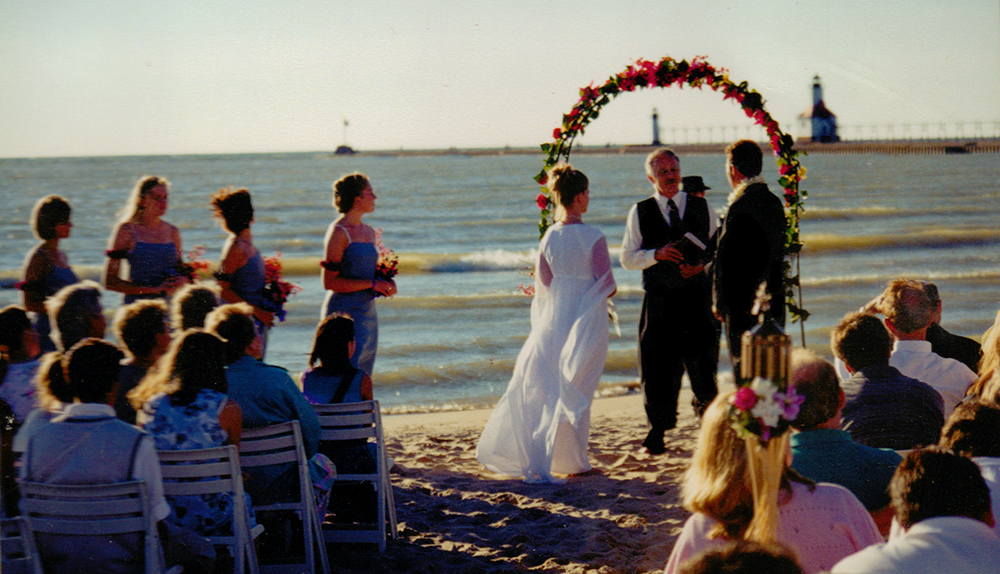
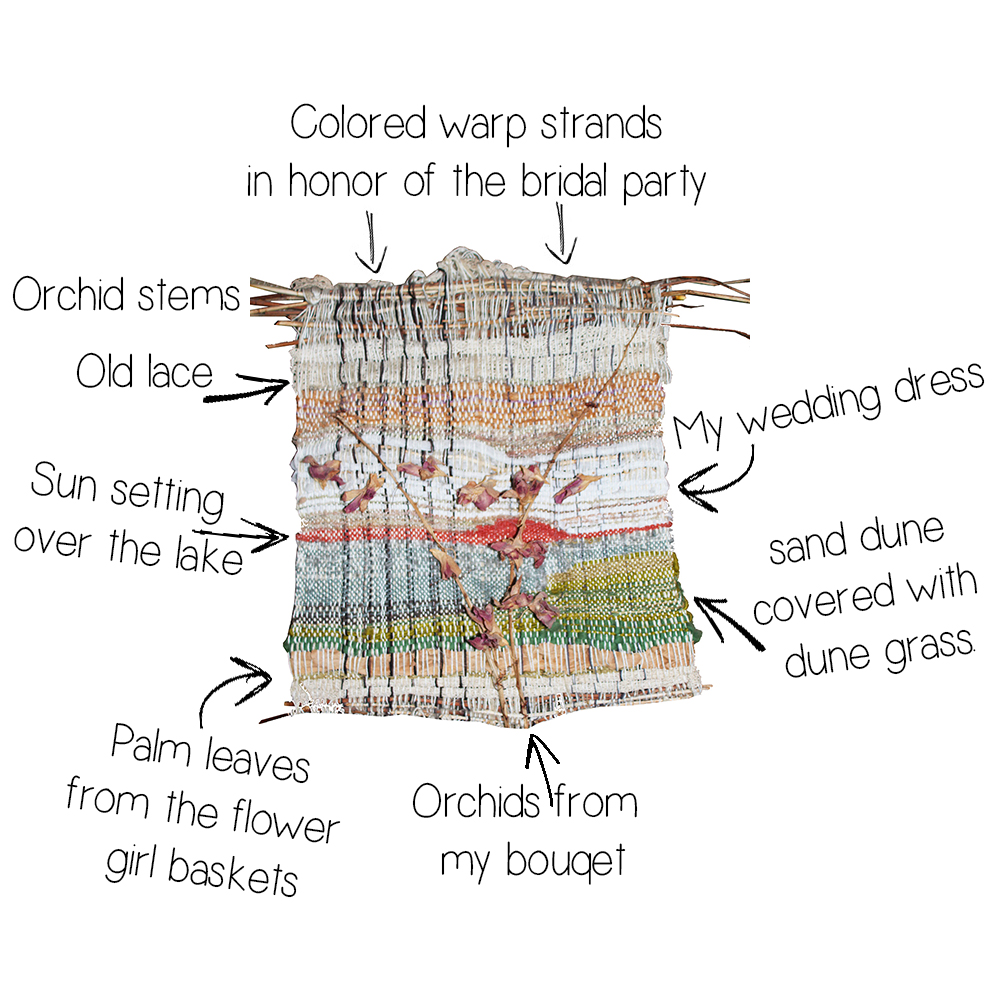
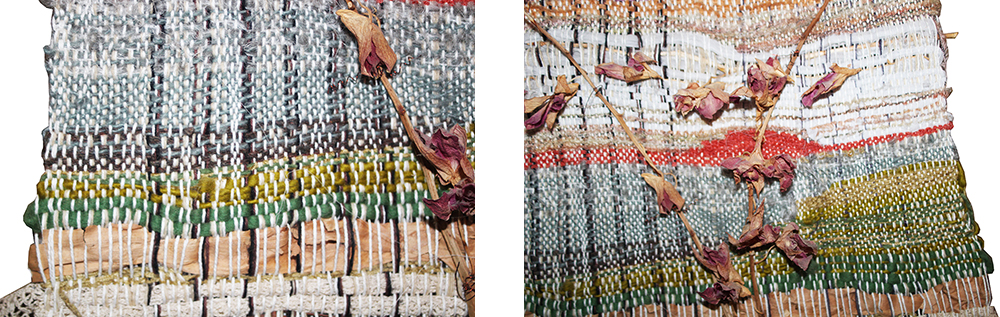
I love the idea of honoring special textiles in our lives by including them into art pieces.
[] :: [] :: [] :: [] :: [] :: [] :: [] :: [] :: [] :: [] :: [] :: [] :: []
 I’ve also written about a dream catcher that I made last Valentine’s Day using strips of fabric from my wedding & bridesmaid dresses.
What are some ways that you have preserved special textiles from your life?
This is a great project to do with kids while camping!

Snake grass likes a lot of moisture, so look for it near wet areas like creeks, rivers, lakes, ponds, and marshes. You will only need one long one that has at least 3 sections to it.
Yarn
Scissors
Yarn needle (optional)
1. Find a strong reed of snake grass and take it apart into it’s sections. Make sure that it is big enough to fit the yarn inside.
2. The center of each section has a small “plug”. I was able to use my scissors to scrape it out. You could also use, a yarn needle or even a small piece of driftwood. You’ll find that each section also tapers a little where it joined the section below it. I used my scissors to cut of this section making it easier to slide up and down my yarn.
3. Decide how wide you want your weaving to be. The more strands that you have, the wider the weaving will be. Cut the yarn to the desired length and tie all the strands together. Thread each strand of yarn through one section of snake grass.
4. Tie the working yarn to the last strand, and begin weaving. When you are running out of snake grass, simply slide each section down to provide more work space.
When you have finished, pull the snake grass off and tie the ends together. I just used one big knot to finish, but if you are doing a wider weaving, you may want to do several smaller knots across the bottom.
Have fun!
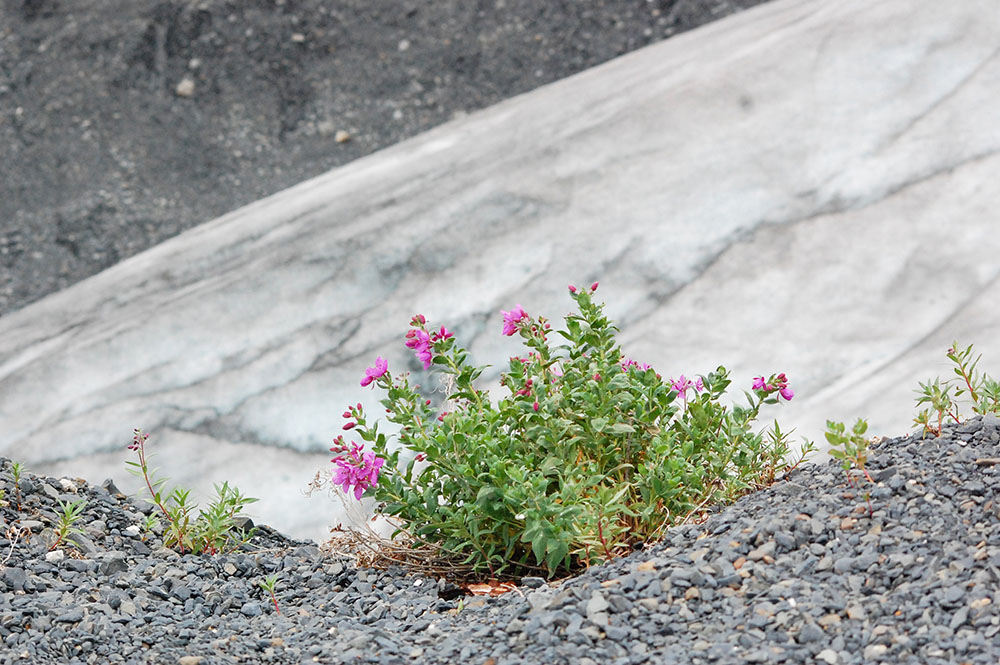 As the glacier at Kenai Fjords continues to recede, it leaves in it’s wake a desolate landscape of steep cliffs and jagged rocks. However, over time, plants do begin to grow, and Fireweed is one of the first plants to lay down roots.
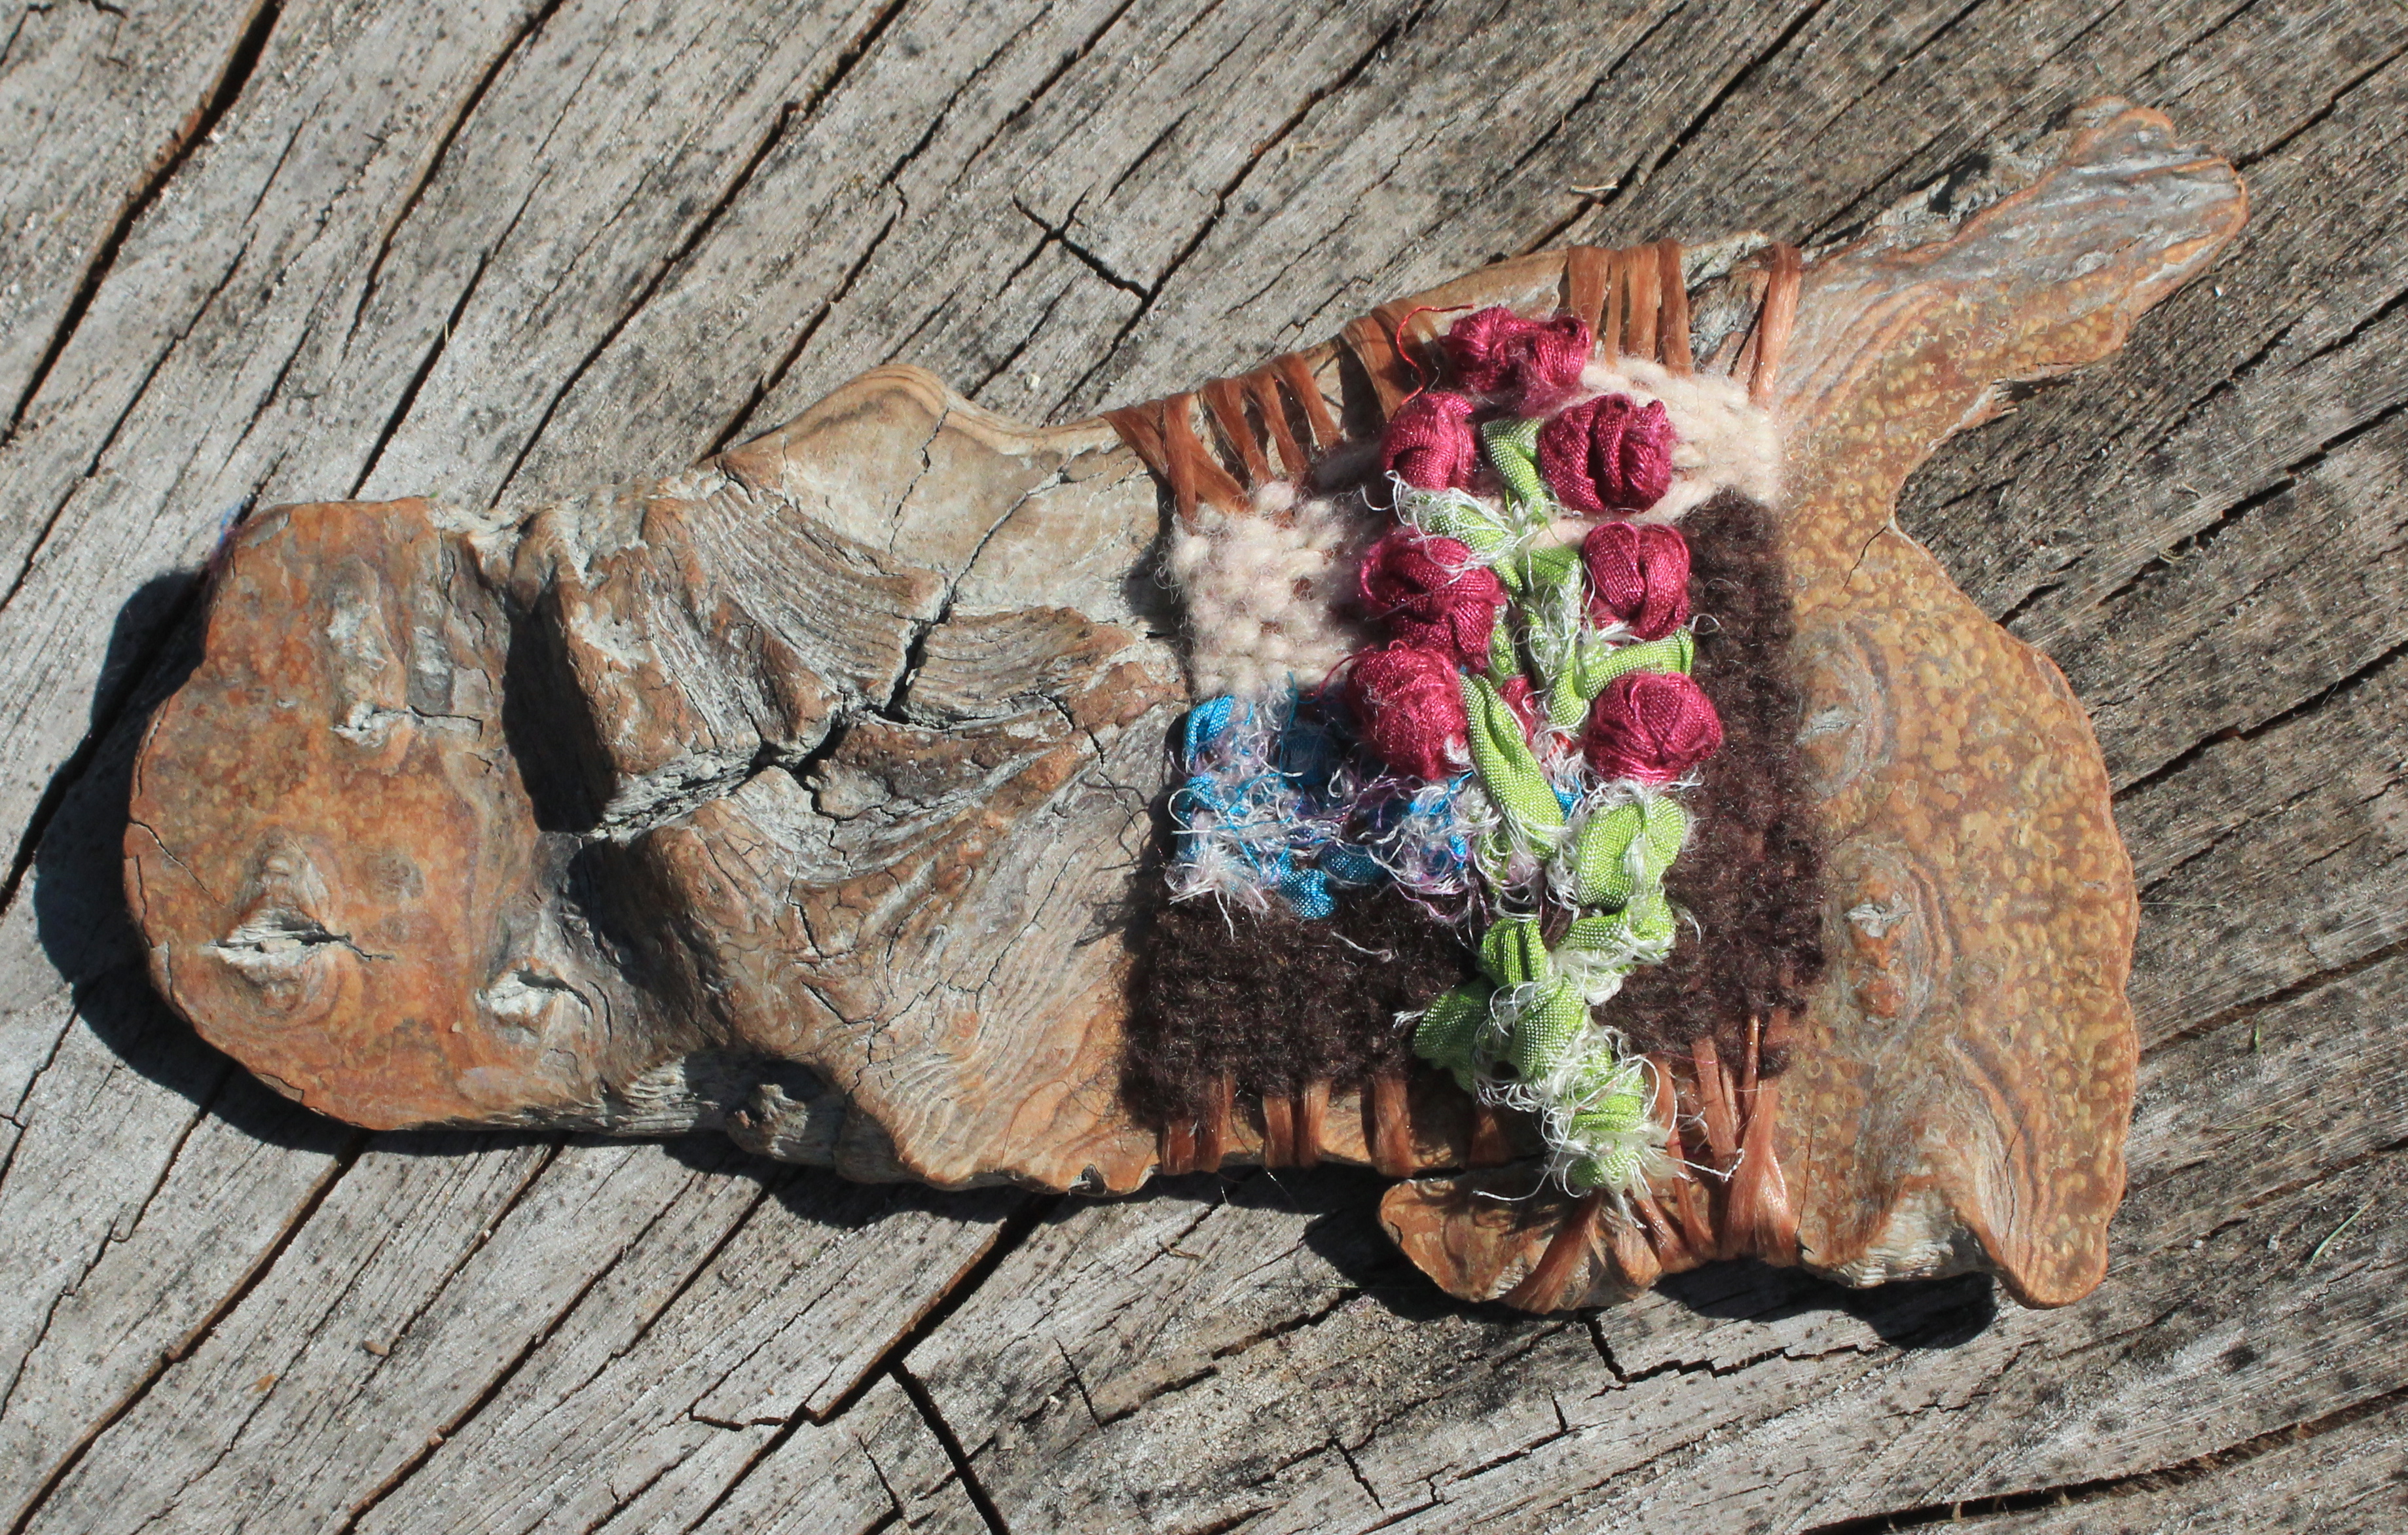
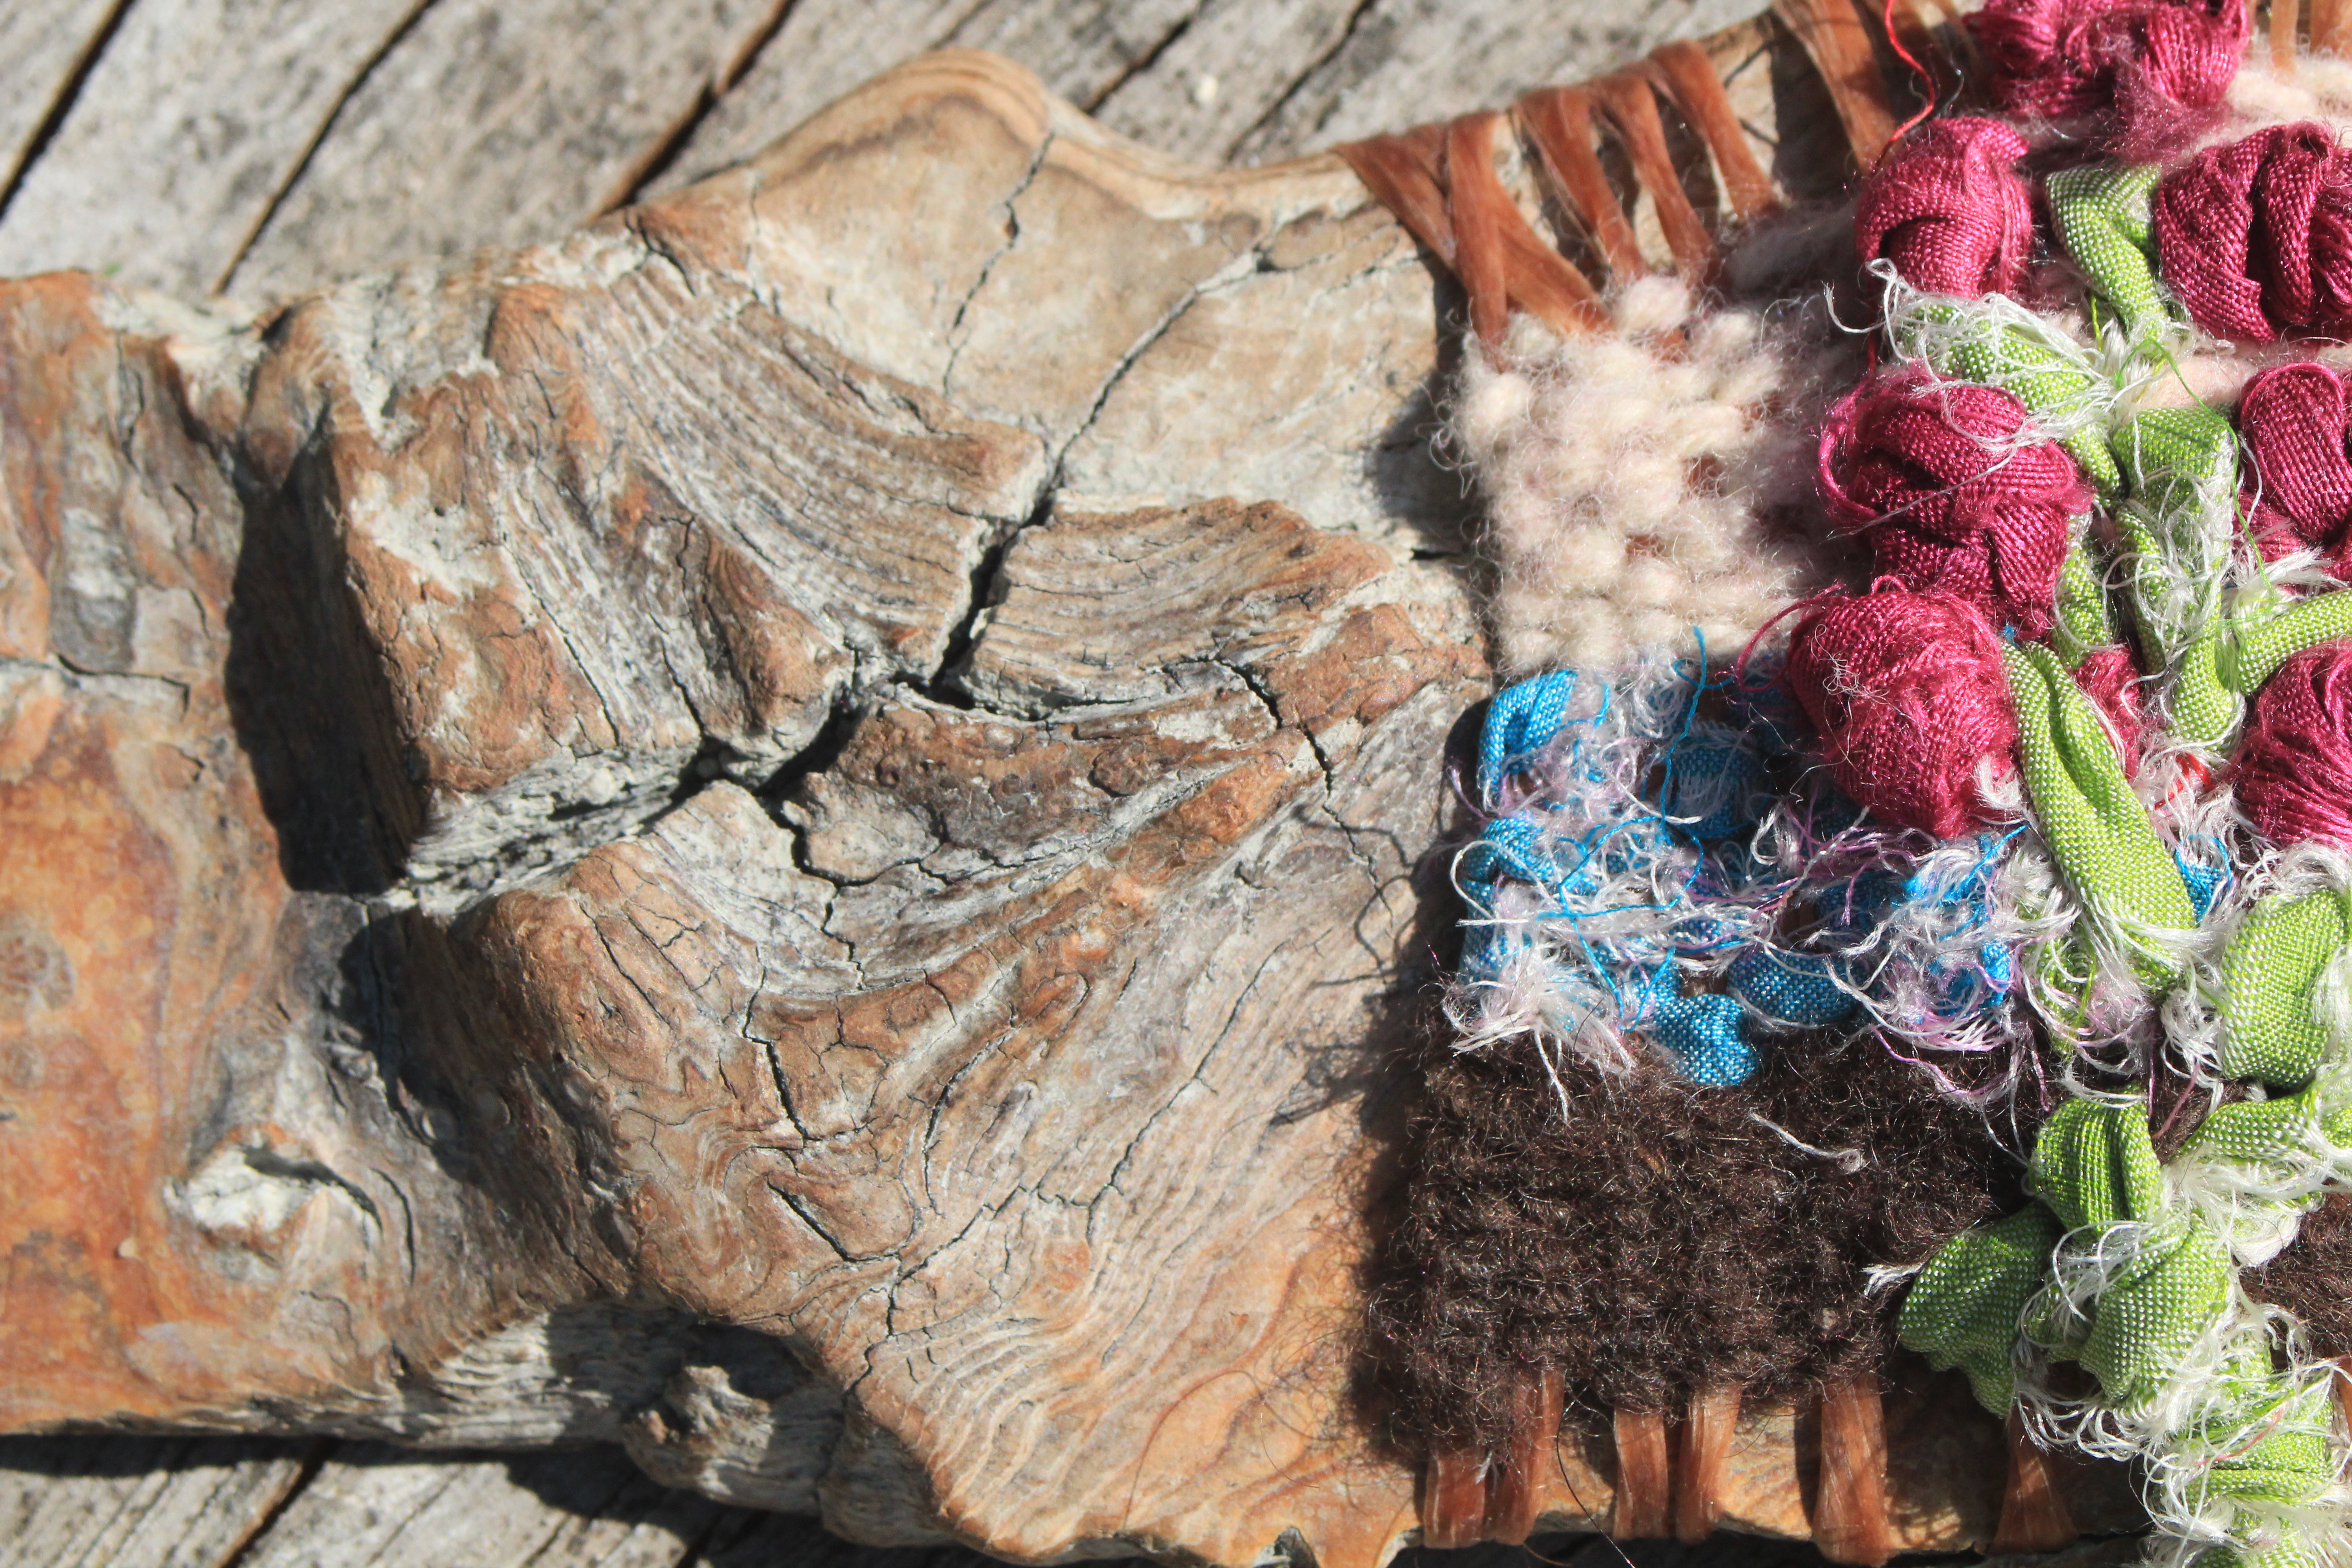
 made by Carrie Beachey
